Events Tickets Marketplace
Overview
GeoDirectory Events Tickets Marketplace extension allows to easily sell event tickets online.
If you are running a directory with events, this extension will give your event listings owners the option to create tickets for their events and sell them through your website. While you as the site owner, have the option to collect a commission for each ticket sold.
This extension can also be used by anyone, to sell tickets of any kind, through their own WordPress website.
Requirements
The GeoDirectory Events Tickets Marketplace extension requires the following plugins:
- GeoDirectory (Free)
- Events Calendar for GeoDirectory (Free)
- GetPaid (Free)
- GetPaid Item Inventory (Free)
- GetPaid Wallet (Free)
If it can't find them during installation, it will auto-install them for you.
Installation
The first step if you haven't already, is to install the Events Tickets Marketplace extension. This can be done by following our guides on how to install an extension.
Once installed, the plugin will add a new menu in the WordPress Dashboard called: Tickets with three submenus:
- Sold Tickets
- Reports
- Settings

Step 1 - Settings
Once installed and activated, you can find the Events Tickets settings at Tickets > Settings.

The Events Tickets Marketplace extension comes with sane defaults meaning the default settings will work for the majority of users, however, there are 2 settings that can be customized .
1. Ticket Sales Commission %
This is the amount of each sale that is collected by the site admin
2. Payment Form
The Payment Form can be Check Out (default) or Wallet (Top-Up).
A. Check Out (default) - Users pay the exact amount for the selected Tickets through one of the available payment gateways.
B. Wallet (Top-Up) - Users pay in advance the amount they wish and top up their Wallet. When they select a ticket, the amount is withdrawn from the balance of their wallet.
Step 2 - Allowing Events owners to Sell Tickets
For the event listings owner to be able to sell tickets, you need to add the Sell Tickets block or shortcode to your Events detail page template.
For example, you can add the block to the GD Sidebar of your website, to show the "Sell Ticket" Button to all the Event Listings Owners.

Or you can use this shortcode [gd_sell_tickets primary_color="primary" secondary_color="secondary"] wherever you see fit on the Event detail page template.
The result will be that all Event Listing Owners, will now see the "Sell Tickets" button on their event as in the image below. Regular website visitors still won't see anything.

Step 3 - Creating the Tickets
Creating tickets is super simple. Right now it is only possible to create tickets from the front end. After clicking the Sell Tickets button, the event listing owner will be presented with an overlay window with the following fields.
- Ticket Name
- Ticket Price
- Available Quantity
- Selected by default
- A button to add more Tickets
- The save button.

After creating the 1st Ticket and saving, the "Sell Ticket" button for that event will be replaced by 2 buttons: Buy Tickets (Visibile to everyone) and Ticket Management (Visible only to the Event listing owner).

Clicking on the Ticket Management button, you will be presented with an overlay window with the following data.
- Types: This is the list of your tickets for a particular event.
- Sales: The list of tickets sold for a particular event.
- Report: A simple reporting screen with statistics about ticket sales for a particular event.
- Scanner: This is the scanner that can be used to validate the tickets via input number or via QR code.

Step 4 - Buying Tickets
Clicking on the Buy Tickets button, users are presented with an overlay window with the Ticket Checkout form.
Here users can select the ticket type (if more than one), set the number of tickets required, add their details, and pay via credit card or any other payment form you allow them to settle with.
In this example we are only asking for an email, however, the checkout form builder of the GetPaid plugin will allow you to ask for any kind of information during the checkout process.

If the ticket is for a recurring event, buyers will have to select for which dates the ticket will be valid.

After paying, they will be presented with the payment confirmation page where users can:
- View the Invoice
- See their invoice history
- Download the Tickets

Step 5 - Download and print the ticket.
If you click the download tickets button you will be presented with the following HTML tickets

Clicking on the print button will prompt your device to print the ticket or alternatively to print it as a PDF and email it to a friend.
Step 6 - Ticket Management for Listings Owners
Other than creating new tickets and editing existing tickets, event listings owners can:
Check Sales

See basic Insights

Scan Tickets QR Code to verify tickets validity

The ticket will provide 5 possible Statuses:
- Ticket Not Valid: The ticket is not for this event [Text highlighted in RED]
- Ticket Valid for (Future Date): The ticket is valid, but it is not for today [Text highlighted in YELLOW]
- Valid: The ticket is for today's event and it is valid [Text highlighted in GREEN]
- This ticket was used X time ago: The ticket has been already used. [Text highlighted in YELLOW]
- Expired Ticket: The ticket is for a past event. [Text highlighted in RED]
When a Ticket is Valid, a redeem button will appear and the Ticket status can be marked as Used.

Step 7 - Ticket Reports for Site Admin
The website admin has 2 pages of reports.
- Sold Tickets - A list of all tickets sold for all Events
- Reports - Insights and Graphs about sales and commissions.
Sold Tickets

Reports

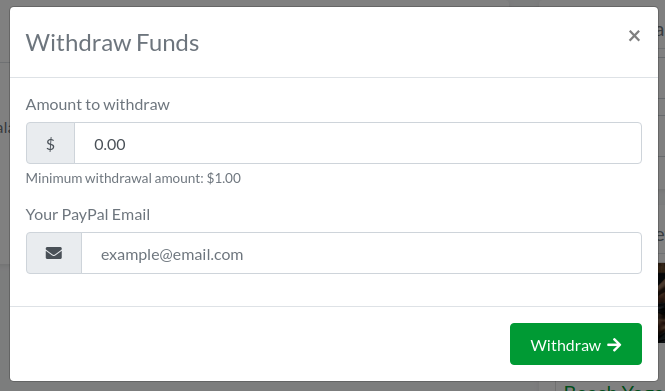
Step 8 - Withdraw funds from Wallet
We use the GetPaid Wallet free extension to distribute the Tickets sales proceedings to each respective Events Owner.
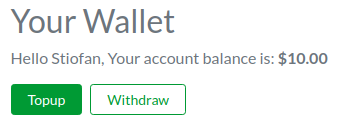
All the site admin needs to do is to add the Wallet Block, Widget, or Shortcode anywhere on their site where users may see their balance and withdraw at any time.
This is the widget output.
Clicking the “withdrawal” button will open a lightbox allowing withdrawals to a PayPal account.
Customizing Ticket and Emails templates
There are 2 email templates and 2 templates for the ticket.
Emails:
- wpinv-email-user_tickets.php - the template for the email sent to the user after purchasing a ticket.
- wpinv-email-tickets_sold.php - the template for the email sent to the event owner after a ticket sale.
Ticket:
- ticket.php - the template for the ticket.
- base.php - the template for the page containing the tickets.
In order to customize the look and content of Tickets and Email Notifications sent by this plugin, please copy these files and move them inside your child theme as follows.
- geodir-tickets/templates/emails/wpinv-email-user_tickets.php to your-theme/invoicing/emails/wpinv-email-user_tickets.php
- geodir-tickets/templates/emails/wpinv-email-tickets_sold.php to your-theme/invoicing/emails/wpinv-email-tickets_sold.php
- geodir-tickets/templates/tickets/ticket.php to your-theme/invoicing/'tickets/ticket.php
- geodir-tickets/templates/tickets/base.php to your-theme/invoicing/tickets/base.php